Freezing and melting process
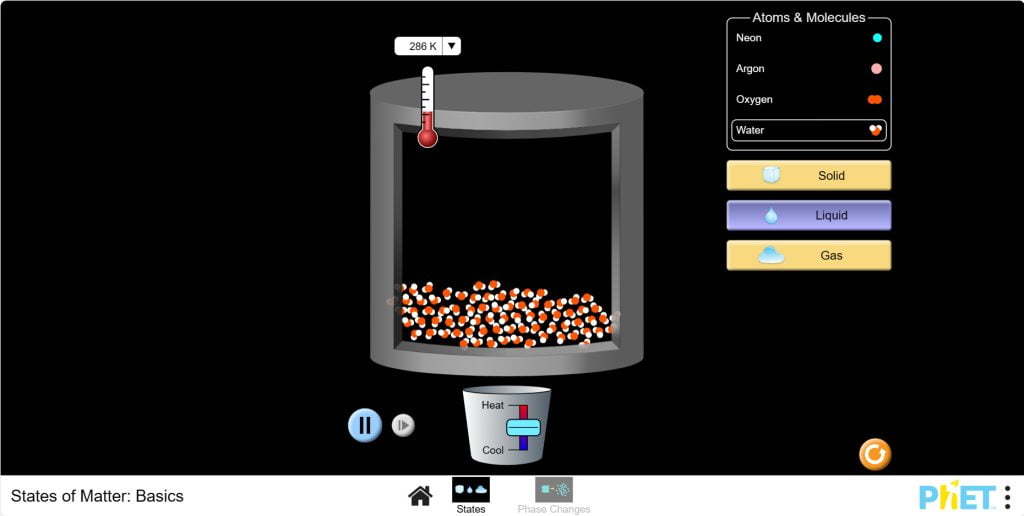
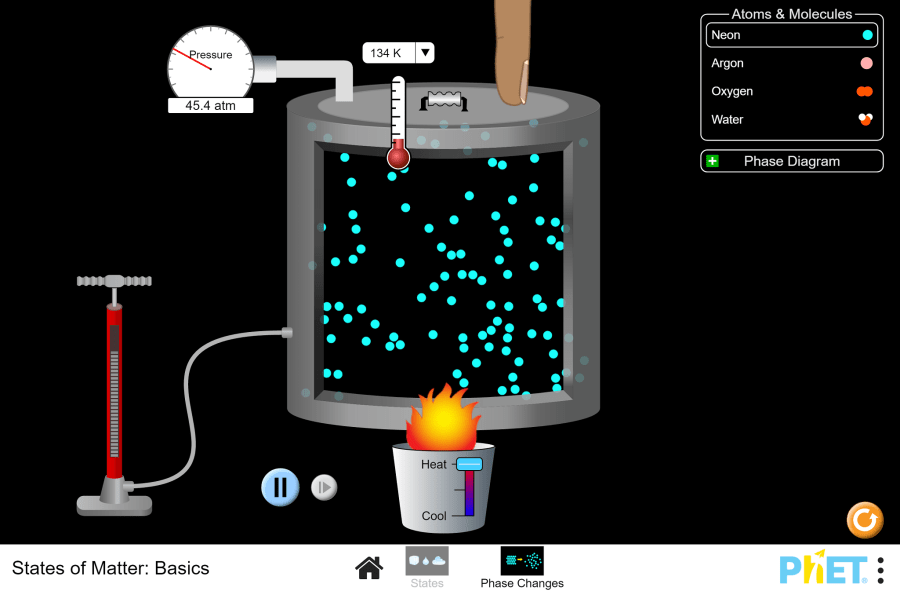
Objective: This virtual lab is designed for use in science lessons on the following topic: Virtual experiment The virtual simulation allows students to visualize the processes of freezing and melting an object. The simulation shows that the motion of molecules and atoms accelerates as temperature increases, allowing them to change from a solid to a liquid and then to a gas. You can control the change in pressure inside the container by heating or cooling the parts. The figure below shows the functions each button performs. Workflow: Step 1. In the virtual simulation, there are two different sections: states, phase changes. Select the “phase changes” section. In the experiment you will work on this section. Step 2. In the workspace you are provided with: Step 3. For convenience, change the unit of the thermometer from Kelvin to Celsius. Step 4. You have a neon atom in the solid state. The temperature shows -259℃ and the molecules are stationary. Step 5. Heat the container. Observe the phase change of the neon with a panel-diagram, and the pressure with a barometer. Step 6. Allow the container to cool. Observe the phase change and pressure of the neon. Step 7. Add parts to the container using the input tool. You will notice an increase in temperature due to the increased pressure inside the container and a shift in the red dot on the panel-diagram. Step 8. Refresh the workspace by clicking the “Restart” button. Step 9. Lower the container lid by holding down the left mouse button until it touches the parts. Observe the phase transition, temperature and pressure. Step 10. Carefully lift the container lid. Observe the changes. Step 11. Refresh the workspace by clicking the “Restart” button. Step 12. Repeat these steps 5-10 for other particle types and conduct different experiments. Step 13. Draw conclusions based on the results of your experiment. How did temperature and pressure affect the phase transitions of the particles? How did adding particles to the container affect the phase state of the particles? Conclusion During this virtual lab, students investigated the behavior of particles in different phase states. Experimental Results:
Freezing and melting process Read More »